


Hssdtech
TPM 2.0 Module TPM LPC 14PIN Module for ASUS ROG Crosshair VI Hero,Crosshair VI Hero (WI-FI AC),Maximus IX Extreme/XI Hero (WI-FI)/ X APEX/IX Hero/IX Code,Rampage V Edition 10,Zenith II Extreme Alpha
Disponibilidad:
En stock
En stock
Peso con empaque:
0.33 kg
0.33 kg
Devolución:
Sí
Sí
Condición
Nuevo
Nuevo
Producto de:
Amazon
Amazon
Sobre este producto
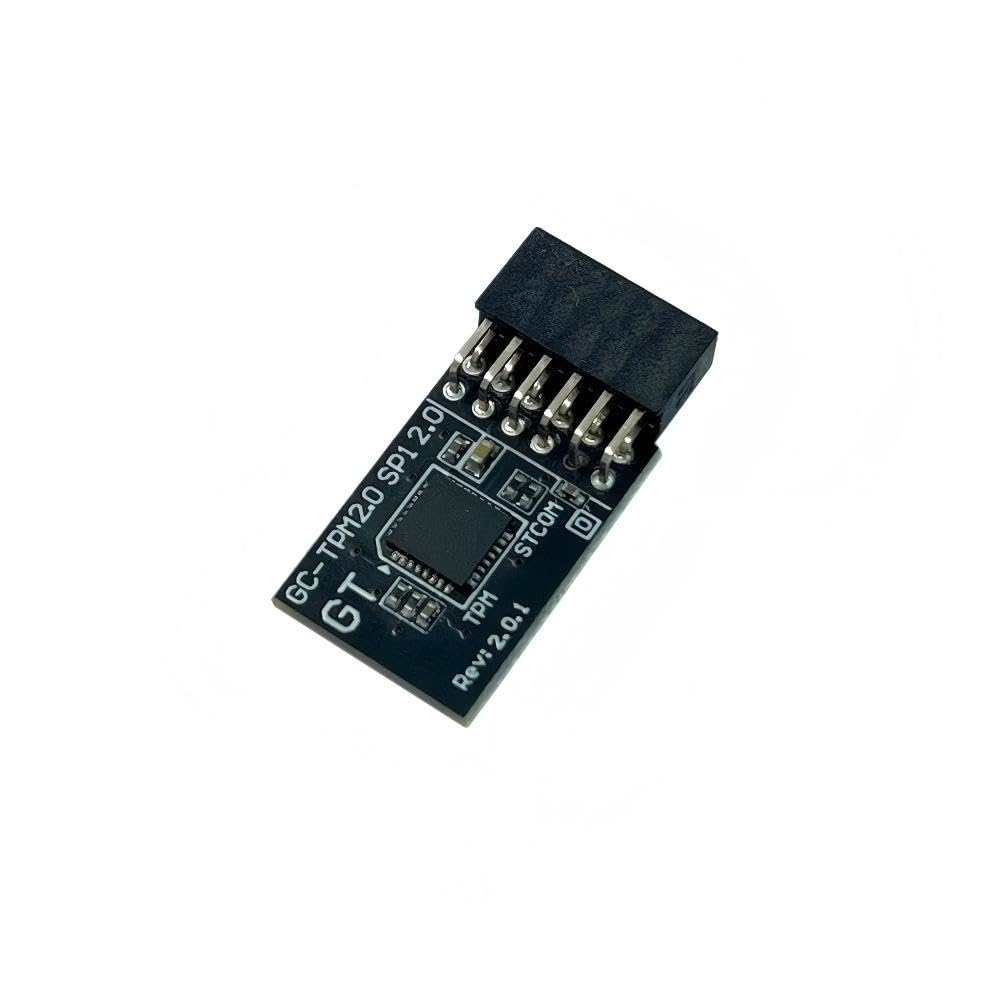
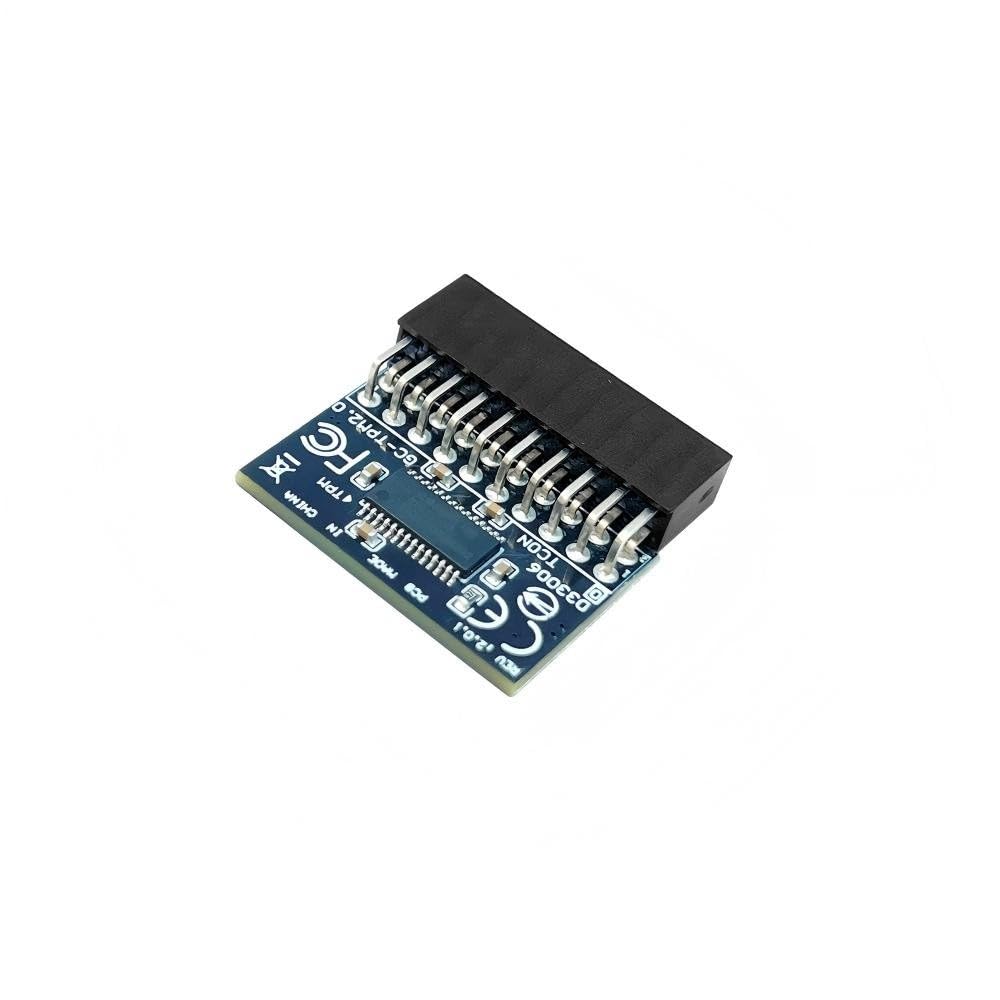
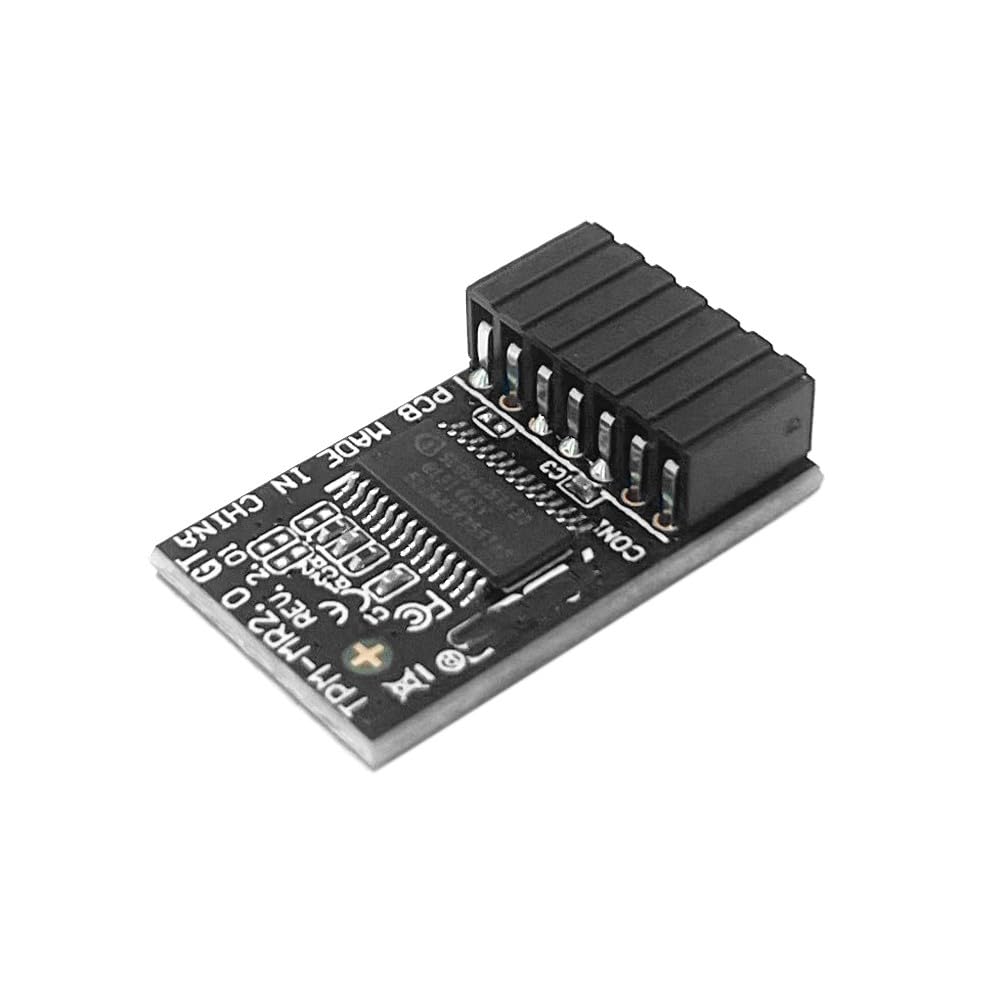
- TPM-M R2.0 Module LPC 14pin-1 with Infineon SLB9665 Replacement for ASUS ROG Motherboard Crosshair VI HERO、 ROG Crosshair VI HERO (WI-FI AC) 、ROG Rampage V EDITION 10、 ROG Zenith II Extreme Alpha
- Compute Securely Bus Header Key Compatible with ASUS ROG Maximus IX EXTREME 、ROG Maximus XI HERO (WI-FI) 、ROG Maximus X APEX、 ROG Maximus IX HERO、ROG MAXIMUS IX CODE、ROG MAXIMUS IX APEX、ROG MAXIMUS IX FORMULA
- Important: The minimum hardware requirements for upgrading to Windows 11 via TPM 2.0 are as follows: 1 GHz or faster 64-bit processor (dual-core/multi-core), 4 GB of memory, 64 GB of storage space, firmware that supports UEFI Secure Boot and TPM 2.0, DirectX 12-compatible graphics card, and a display with a resolution of 720p or higher.
- Purpose a: Resolve the TPM 2.0 verification issue when upgrading to Windows 11, enabling it to function as an independent encryption chip, providing secure storage for sensitive data, and enhancing security;
- Use b: Hardware encryption acceleration, such as improving game lag issues and other functions.
- Easy Installation: The installation process is extremely straightforward. Simply locate the 14-pin connector labeled “TPM” or “LPC” on your for ASUS ROG STRIX motherboard while the system is completely powered off. Align the module correctly and insert it into the socket. No additional drivers are required. After enabling the TPM feature in the motherboard BIOS, the operating system will automatically recognize the module, delivering a true plug-and-play experience.
AR$74,245
49% OFF
AR$38,071
IMPORT EASILY
By purchasing this product you can deduct VAT with your RUT number
AR$74,245
49% OFF
AR$38,071
Llega en 8 a 12 días hábiles
con envío
Este producto viaja
de USA ![]() a tus manos en
a tus manos en
![]()
Compra protegida
Disfruta de una experiencia de compra segura y confiable
Tarjetas de Crédito y Débito
Visa
Mastercard
American Express
Pagos a través de PayPal
Compra procesada en dólares con dinero en cuenta o tarjetas internacionales.
Paypal
Pagos a través de MODO
Compra procesada en pesos desde la App de tu banco.
PayPal
Conoce más detalles
Compatible models: for ASUS Motherboard TPM Trusted Platform Module ROG Maximus IX EXTREME ROG Maximus XI HERO (WI-FI) ROG Maximus X APEX ROG Maximus IX HERO ROG MAXIMUS IX CODE ROG MAXIMUS IX APEX ROG MAXIMUS IX FORMULA ROG Crosshair VI HERO ROG Crosshair VI HERO (WI-FI AC) ROG Rampage V EDITION 10 ROG Zenith II Extreme Alpha Compatible with TPM-M R2.0(14pin-1 ) Chipset: Infineon SLB9665 PIN DEFINE:14Pin Interface:LPC Important Notes: 1. This product is only compatible with older motherboards such as Intel and AMD. It is not compatible with newer motherboard models featuring firmware TPM, all-in-one PCs, or laptops. 2. The minimum hardware requirements for upgrading to Windows 11 via TPM 2.0 are as follows: a 1 GHz or faster 64-bit processor (dual-core/multi-core), 4 GB of memory, 64 GB of storage space, firmware supporting UEFI Secure Boot and TPM 2.0, a DirectX 12-compatible graphics card, and a display with a resolution of 720p or higher. 3. This product has a 14pin-1 connector. Please carefully check the pin positions in the image to ensure compatibility with your motherboard before purchasing. Core Applications: 1: Seamless upgrade to Windows 11: Resolve TPM 2.0 verification issues and easily upgrade to the latest operating system. 2: Enhanced hardware-level security: Provides an independent secure encryption chip specifically designed for securely storing sensitive data (such as encryption keys, digital certificates, and login credentials), thereby enhancing overall system security. 3: Hardware encryption acceleration: Reduces CPU load by accelerating encryption operations via dedicated hardware, indirectly improving system response speed and enhancing the smooth operation of certain encryption-dependent applications (such as games and security software). How to select and install a security module: 1. Confirm whether the host has TPM 2.0 or if TPM 2.0 is enabled. 2. Click “Run,” enter: tpm.msc (Win+R keys), and check if the TPM version is ready. 3. If version 2.0 is displayed but not ready, you need to configure settings in the BIOS; consult the motherboard manufacturer's customer service. 4. Open the host and inspect the TPM pins on the motherboard. 5. When installing the module, ensure the chip-side faces inward, align with the pins, and insert fully to prevent loosening. (See image for direction)

